
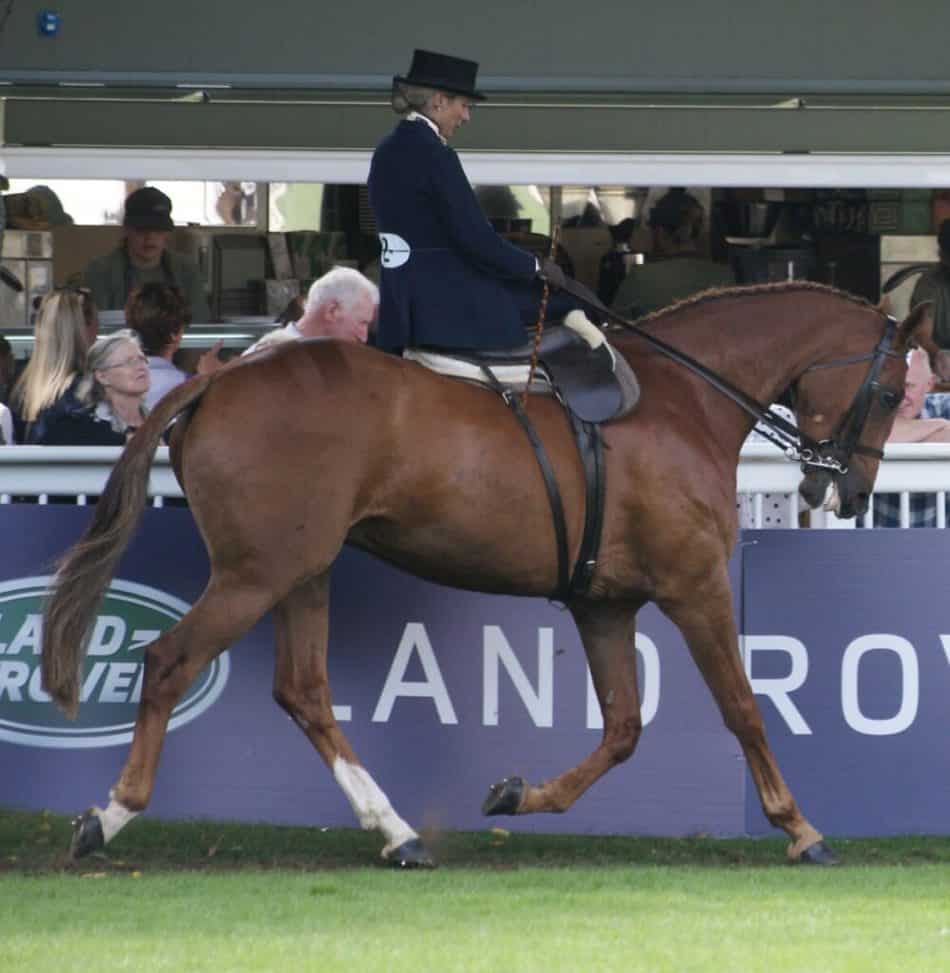
What Are Quarter Marks?
Quarter Marks, are decorative Designs on Your Horse’s Booty! That’s right; they are a way of attracting attention to that big old engine of the Horse, the Hind Quarter. Remember the old saying that a horse should have, “the Head of a Duchess and the Bottom of a Cook” Well Quarter Marks, are a way of drawing attention to your horse’s Big Beautiful Bottom, particularly in the show ring.
So what are the Best Quarter Marks for the Show Ring?
Traditionally there was always the Checkerboard Design, or striped design, such as Flashes or Sharks Teeth. However, in recent years, the use of stencils has become popular with Equestrians and these can have very decorative custom designs to highlight their horse’s greatest Asset. However, stencils are mainly used with Showjumpers, Eventers or Dressage Horses.
For the show ring, Flashes, Sharks Teeth or the Checkerboard is probably the best choice, but if you are competing in other Equestrian Sports as mentioned above, you can probably get very inventive if the mood takes you. As far as I can remember Judy Reynolds our Irish Dressage Rider likes to have a Shamrock on Vancouver K’s, aka JP’s Greatest Asset, which I think is a lovely gesture.
What You will Need to get Quarter Marking.
- A bucket of Water and a sponge
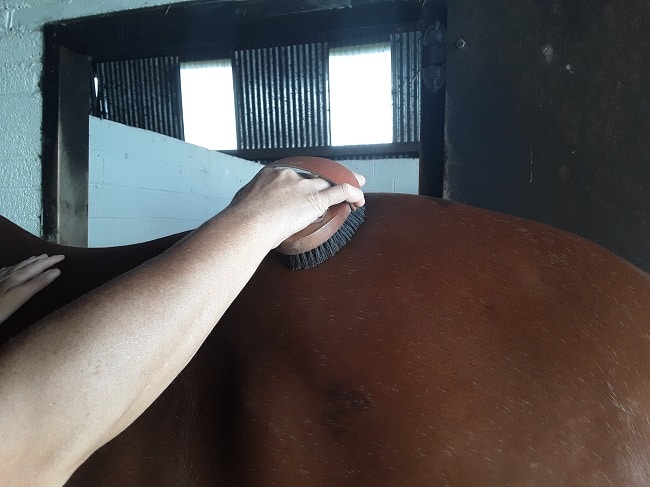
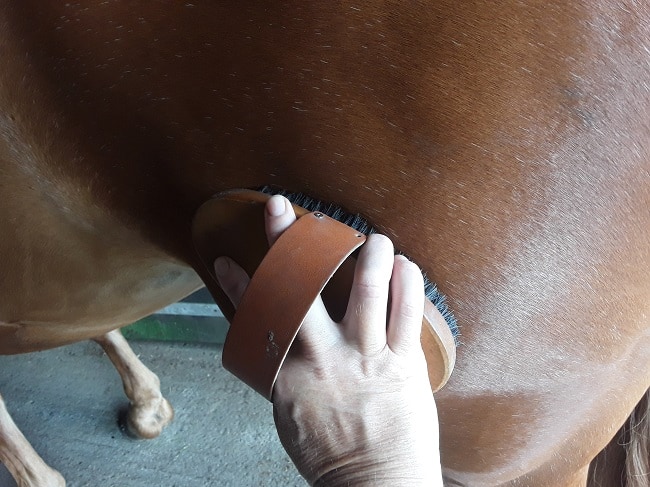
- A Body Brush
- A small comb for Checker design
- A Stencil for special designs such as a shamrock.
- A Little Hair Spray to Spray the Area and Keep the Marks in Place.
- Show Sheen – To add that extra sparkle.
Applying the Quarter Marks.
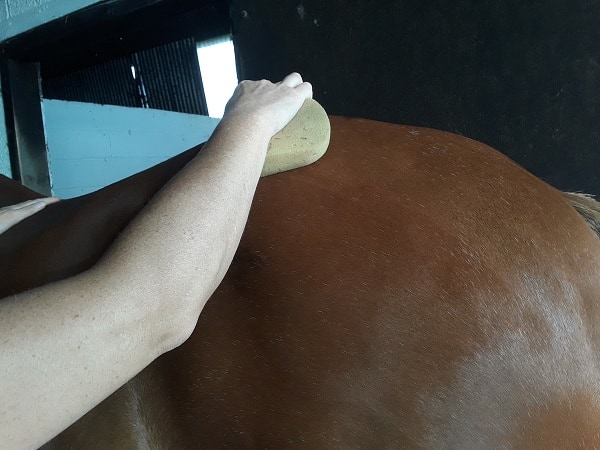
Start By: Using Your Dampened Sponge damp your horses coat in the area you will be working.
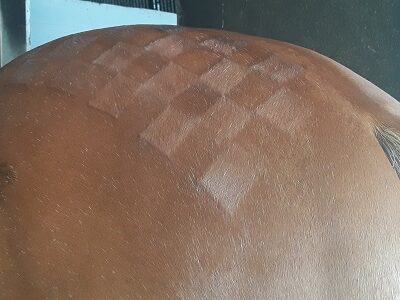
Checker Design, this is usually used on Hacks and Riding Horses.
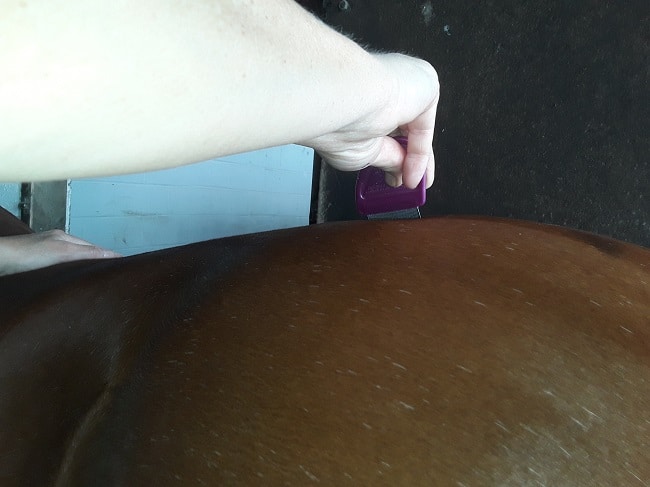
Step 1; Using a small comb you will start at the top of the Quarter near the midline of the horse. Make small square marks with your comb by brushing the hair downwards toward you; leave a even space before starting your next square. Try to keep your squares in an even line.
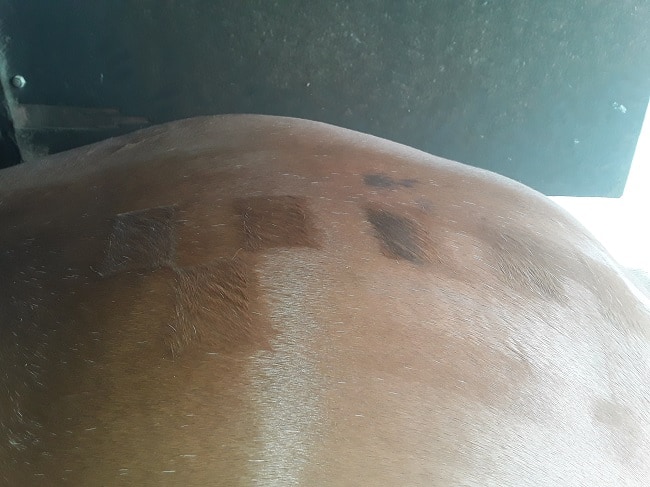
Step 2: For your next line of squares, make your marks alternately, to give the checker design;
Step 3: Repeat for 3 to 4 lines, or whatever looks best on your horse. Don’t worry if you make a mistake, just use your body brush to brush it out and start again.
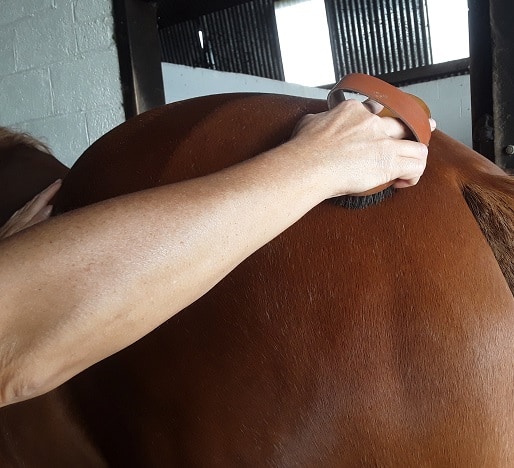
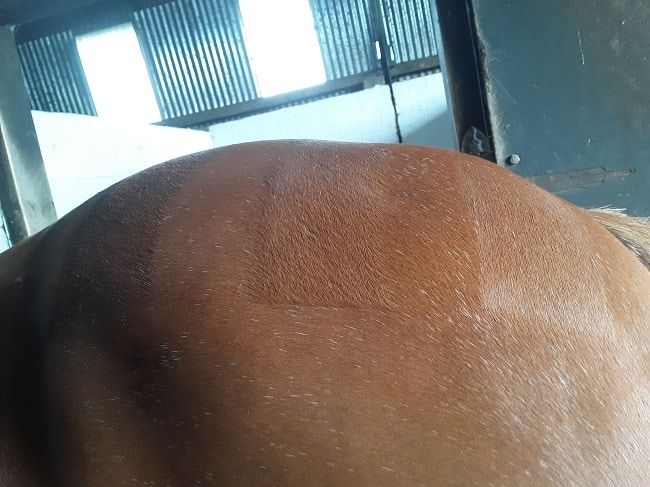
Flashes are used to give emphasis to the top of the quarter.
Flashes are used to give emphasis to the top of the horse’s quarter and are normally used on Show Hunters. Check out the Steps for applying them below;
Step 1; Again damp the hair of your horse’s quarter, then start with the Body Brush High on the beginning of the Quarter, pulling straight downwards towards you.
Step 2 – Leave a gap and then make another line down as in the picture, usually 3 Flashes looks well.
Step 3– Finish by making a straight even line across the bottom of the Flashes.
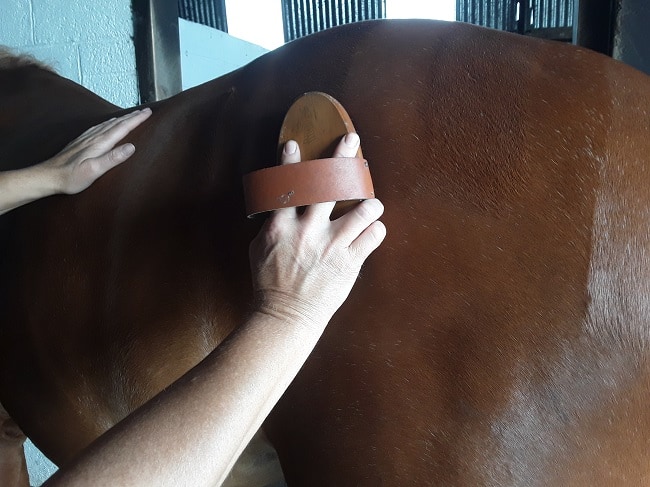
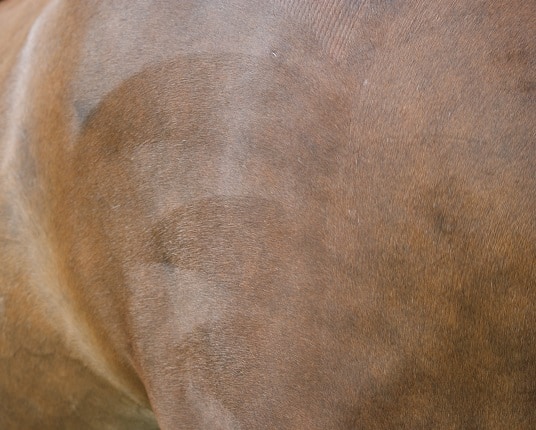
Sharks teeth are also popular to emphasize the quarter.
Sharks teeth are also used to emphasize the Horse’s Quarters they are positioned lower on the quarter and are often accompanied by flashes. Normally used on Show Hunters.
Step 1 – To do sharks teeth design, start again by damping the horse’s hair. Start mid way on the quarter, below and behind the point of hip with the first brush stroke, curve up and back towards the tail. For the next brush stroke start at the same point, but brush down and diagonally again in the direction of the tail.
Step 2 –For the next section, begin at the end of the last stroke and start the process again, the first stroke curving up and back toward the tail, and the second stroke starting at the same point but brushing down diagonally in the direction of the tail. Continue the process until you are left with a line of sharks teeth as in the image below.
Step 3 – You can tidy the back of the quarters by brushing downwards in a line along the back of the quarters, as in the image of the Sharks Teeth the finished product.
To Complete The Quarter Marks.
Once you are happy with the look of your quarter marks, A small amount of hairspray can be used to keep the marks in position, and a little Show Sheen applied to give that extra sparkle when you’re done.
My advice is to practice as much as possible to perfect your design and it’s always a good idea to practice what you intend to do well ahead of your show day. On your competition day give yourself plenty of time to get your design looking Fantastic so you attract those pleasing glances from the judges.
Happy Grooming!
This Article was originally published in the August 2019 Issue of Irish Sport Horse Magazine. All Pictures are either the property of Irish Sport Horse Magazine or provided for Irish Sport Horse Magazine.